Sunday 25 December 2011

Neutralising Vinyl

I get asked often about neutralising vinyl colours to make them enough of a neutral colour to get a realistic final skin tone.  This step is one of the most important in the reborners art, understanding colour and how to cancel it out is an essential skill and takes patience, practice and a good understanding of the colour wheel, knowing what colour will cancel out another is really important. 

To start this series of articles on neutralising kits I will begin with a 
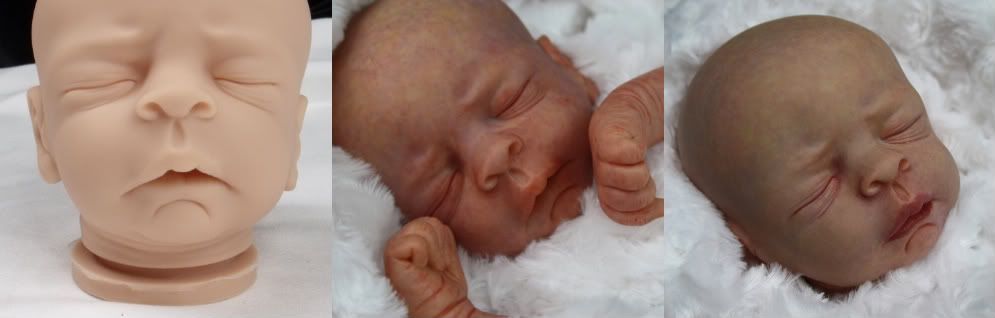
Secrist kit, Erin,  Secrist kits tend to be quite peachy coloured, you can just paint straight onto the kit un-neutralised but the finished result will still have that peach tone underneath your skin paints and doesn't really give the realistic skin tone that you want. 

It's no longer used technique to paint inside kits, its been shown that colour over time can leach through the vinyl so all paint work it done on the outside of the kit. 


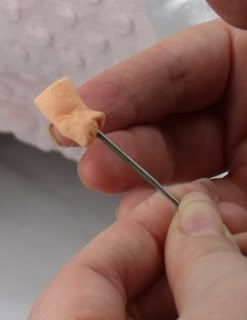
To neutralise (cancel out) the peach tone of this kit and give a nice colour to work with the colour I use is a pale minty green.  This is applied all over the kit, although I do avoid using it on the lips and on the palms of the hands and soles of the feet of my kit.  You can do the entire surface of the kit but as I am going to paint those parts of my kit a pink anyway it seems a bit pointless to neutralise them first. 

To make this colour I use the lightest Flesh Colour  (Flesh 08)  and Phthalo Green 06


There is a colour very similar to this called Earth Mint produced by Bountiful Baby in a pre-mix but I do think that it is good practice for an artist to learn to mix their colours from scratch.  If you mix it, you understand it and if you understand how colour is created and works then you can use it better. 

Mix your colour as you would any other skin layer, its much easier to apply paint that to remove it, so thin layers are the key.  I find that 2 or 3 ultra thin layers works a treat. 

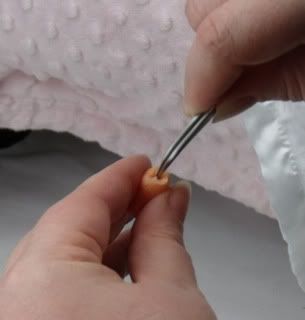
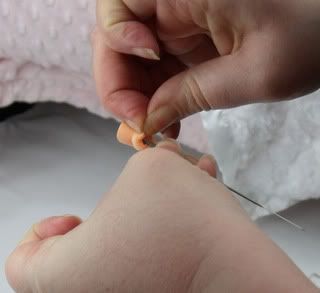
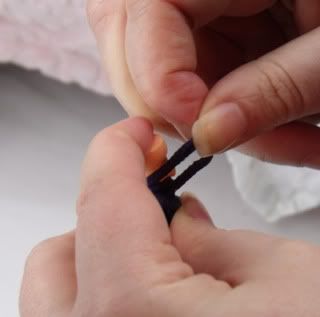
I apply this colour to my kit with a mop brush or similar brush, make sure you don't have your brush dripping with colour and use a cosmetic wedge to pounce the colour in once it is applied. 

Leave your kit pieces to one side, do not bake straight away, it's much easier to see gathered colour and streaks once the thinners have flashed off. and then use your sponge to blend any streaks or gathers you may have developed.  Once you've done that, bake. Allow to cool and then assess whether or not your kit needs another layer. 


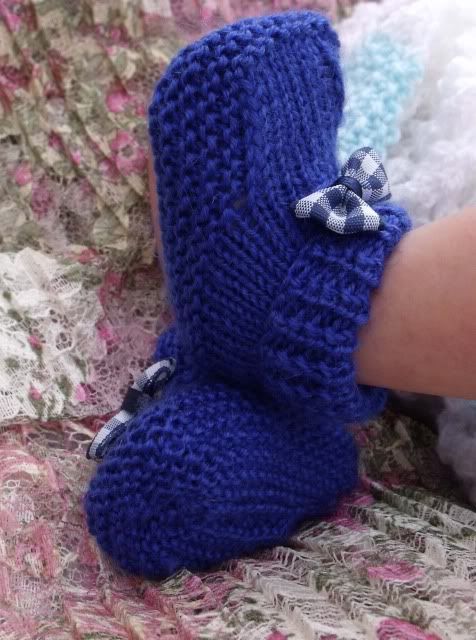
You can see in the picture the difference in colour.   At this point you can now apply skin layers as you normally would.

Monday 27 June 2011

Life Saving Accessory

If you use Genesis Heatset paints for any length of time one of the things you will eventually find that annoys you is dust in your paint.  It's never easy to guess how much paint you will need for a particular baby and if you are like me and like to mix your own shades it's never easy to remember exactly what quantities of each colour...   I always ended up with tons of paint going to waste or sitting in my pallet and going dry and dusty over the hours, specially overnight. 


And then a moment of genius struck, it does happen on occasion,  little jars, that's what I needed.  And what an amazing bonus they have been... cheap and cheerful but so useful.  Mix your paint as you normally would 1 part GHSP to 10 parts thinner is the usual ratio.   


I like to mix up a lot of my favourite colours and I can relax in the knowledge that once the lid is on the jar my paints will remain dust free and the thinners won't evaporate too quickly either. 


GHSP lasts indefinitely inside the jars, some of my paints have been in my jars for months I just keep topping up with thinners and additional paint if I am running low.


The paints do separate from the thinners and float to the bottom of the jar over time. But don't let this concern you,  the paint is just heavier than the thinners so the particles of paint will drop down... but a quick shake of your closed jar mixes the paint back up.


Do make sure to test your paint thickness however as even with the lid closed tight thinners will evaporate to some degree so you may need to add extra


I do bring empty jars with me and have them on my tables at dollshows so if you want to grab a set of 6 for £4 pop by and see me. 


 Genesis Heatset Paint supplies available from Gloriarty.co.uk


Monday 20 June 2011

Discover Dolls Show - Peterborough June 2011

As always the Discover Dolls Show was a busy and full weekend.  The summer version of the doll show ran over two days. On the first day as well as the stands there was also demonstrations by Doll Artists showing different painting and rooting technique over several hours during the middle of the day.


I was really impressed by the generosity of the doll community as was shown by the tables laden with prizes for both the Make A Wish Foundation fund raising and the Tombola.

My own donation to the Make A Wish table was Fraser who was lucky enough to be won and went off with his happy new owner. 


For me however, the best part of the weekend was having a visit from our friends Sam and Garry,  Sam who was a star helping me out over the two days but also just the fun we had over the entire weekend.  Friends do seem to make any event so much better.

Friday 17 June 2011

Silk Yarn Rocks

My husband is teasing me mightily for my latest obsession with knitting booties... started off as a quickie thing that I could do in the car on those long car rides. I've knitted since I was little, my mother says I started at about 4 or 5 and I used to knit a lot but in the moves and the packing and unpacking I kind of mislaid all my things.  

Why booties?  Well because they are quick to do and there is an infinite variety, I can experiment with different wools and patterns. Craftwise it's pretty instant gratification. 

So today's little beauties are these booties... knitting in silk yarn, incredibly fine at only about 2 ply and knitted on 2mm needles... teeny tiny little gems!

Who could resist this blue it's so jewel like.  I made these to fit a teeny baby or sculpt.


Modelled here on Cora my First Love Sculpt and she is only a 14inch reborn so you can see these boots will keep tiny tootsies terribly toastie... Hey I'm a poet I just didn't know it!


More of my bootie creations are for sale on my new website www.bootielicious.co.uk

Saturday 23 April 2011

First Group Teaching Experience

I had my very first experience of teaching in a group setting just before the recent Brighton Doll Festival. I have to admit to being quite scared beforehand.  I mean I have taught in a one on one setting and although nervewracking being one to one with someone you don't have to be so concerned about timing the class or rather running out of time. 

I was lucky enough to have three lovely students for my first group lesson, all three were keen, motivated and open minded about what we were going to do with our two days. We were blessed with excellent weather, it's always so much easier to be creative when the sun is shining!   And also blessed with a wonderful venue for our workshop. 


Ceinwen Clarke played host to the workshop in her light airy workroom, light and airy but also a treasure trove of crafting goodies... the urge to go for a rummage is always difficult to resist in that room.  We were working on an Ember sculpt, a very cute sleeper kit.  On the first day we managed to do the bulk of the skin tones on our kits and it left us in just the right position to concentrate on the fine details and to be able to have rooting demonstrations from myself, Ceinwen and Donna Wells.    As well as Donna giving an excellent weighting demonstration which just showed how different everyone's techniques can be. 

By the end of the two days the three students went home with completely painted and assembled babies and very full tummies from all the excellent food Ceinwen plied us with.


Future classes are going to be held in Brighton, Wellingborough and Whittlesea, for details feel free to contact me, Ceinwen or Cathy Read.

Wednesday 9 February 2011

DIY Rooting Needle Holder

I don't particularly like any of the commercially made needle holders, I get really bad RSI and i find they make my wrists ache... Plus I am quite heavy handed and tend to snap needles if they are in the commercial holders. So this is my way of getting round those problems, I find the needles flex more this way and are less likely to snap.

You will need:

1 Earplug (you could use something else but I find earplugs cheap and flexible

Rooting Needle

2-3 Hair bands (the cheap ones without the metal closure are best)

You will also need a pair of needle nose tweezers, you could actually just do this with a rooting needle but it runs the risk of bending.

I got these from an electrical store called Maplin for about £2 and I find them great for use during rooting as well for pulling out the extra hairs.

The first step is to poke a hole into your earplug, doesnt have to go all the way through, grab the centre of the ear plug with your needle nose tweezers and twist, that bores quite a nice neat little hole.


Push the end of your needle into the hole in your earplug and pull the earplug down, don't go push the needle all the way through, the earplug will act as protection for your fingertip.

Once your earplug is on take one of the hair bands and twist it round and round over the top of the needle... avoid doing this at the business end... there can be painful consequences.

I find 2 hair bands works fine for me, but you can use 3, twist them nice and tightly.

This is what you should end up with.

Monday 10 January 2011

First Love Now Named Cora Completed

It's been a couple of weeks since I started this little one and now having completed her, a name just popped into my mind when I looked at her little face.  Cora,   a sweet little name for a tiny little poppet.

Having said that, I am reliably informed that this baby is not a girl and is very much a boy.  No!!! Say it ain't so!  I think I need to stare at her/him a bit more and really make sure.  But I suppose if people can see a baby dressed in pink and surrounded by pink and still tell you it's a boy then hmmm one ought to think again.


Deanna Goes to Spain

I had a lovely little Christmas surprise when one of my auctions finished with a happy ending as little Deanna caught someone's eye. Deanna has now made her way to Spain to meet her new family.  


Sunday 9 January 2011

Maya Leaves The Nursery

Little Maya was adopted just after Christmas,  a lovely couple came to visit my nursery to look over the babies I had available and little Maya caught their eye.


So after some cuddles Maya has left Best Beloved with her new family. It was a very special experience seeing someone fall in love for the first time.

Saturday 1 January 2011

WIP - First Love

This is a sculpt that I just had to get, as soon as I saw the original sculpt by Ruth Annette on Facebook I just knew I wanted to do this little one. That fragile gentle little face is just something very special. 


As a little Christmas light relief I thought I would just enjoy some painting time, it's funny how although it's quite a skillful thing to do it's also very relaxing and I find it very relaxing, I find that as I am painting my mood lifts, no matter how black and the tension I am feeling eases.  Maybe that's just a reaction from doing anything that you enjoy.

I've worked on the base laters, the earliest skin undertones in blue, red, green and purple which always look a little strange.


I am really happy with the skin tones that are developing,  I will update in a few more layers.